Arduino Alarm Clock with Temperature sensor
Hello Friends,
If you make alarm clock please read it carefully because of some important things you have to follow for your device safety.
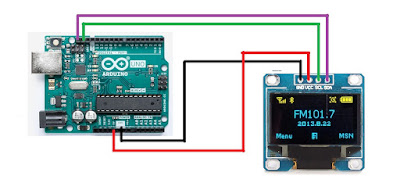
CIRCUIT DIAGRAM
for library
click here
SOURCE CODE
--------------------------------------------------------------------------------------------------------------------------
#include <Wire.h>
#include <LiquidCrystal_I2C.h>
#include <DS1302.h>
LiquidCrystal_I2C lcd(0x3F, 16, 2);
int Hour;
int Min;
int pset = 8; // pushbutton for setting alarm
int phour = 9; // pushbutton for hour
int pmin = 10; // pushbutton for minutes
int pexit = 11; // pushbutton for exit of set alarm
int buzzer = 6;
int h;
int m;
int buttonforset = 0; // pushbutton state for setting alarm
int buttonforhour = 0; // pushbutton state for hour
int buttonformin = 0;// pushbutton state for minutes
int buttonforexit = 0; // pushbutton state for exit of set alarm
int activate=0;
float temp;
Time t;
DS1302 rtc(2, 3, 4);
void setup()
{
pinMode(pset, INPUT);
pinMode(phour, INPUT);
pinMode(pmin, INPUT);
pinMode(pexit, INPUT);
rtc.halt(false);
rtc.writeProtect(false);
lcd.begin();
// using following lines set time and upload program on your bord after uploading again convert below lines in comments and again upload it
//rtc.setDOW(SATURDAY); // Set Day-of-Week
//rtc.setTime(10, 0, 0); // Set the time
//rtc.setDate(11, 11, 2017); // Set the date
}
void loop()
{
temp = analogRead(A0); //Reading the value from the analog input
temp = temp * 0.48828125; //Sensor calibration to get the real value
lcd.clear();
lcd.setCursor (11,0);
lcd.print(" C"); //Celsius of course :D
delay(1000); //Refresh every 1s
if (activate == 0) {
// Display time value on the right conrner upper line
lcd.setCursor(0, 0);
lcd.print(rtc.getTimeStr());
// Display abbreviated Day-of-Week in the lower right corner
lcd.setCursor(14, 1);
lcd.print(rtc.getDOWStr(FORMAT_SHORT));
// Display date in the lower left corner
lcd.setCursor(0, 1);
lcd.print(rtc.getDateStr());
t = rtc.getTime();
Hour = t.hour;
Min = t.min;
buttonforset = digitalRead(pset);
} // setting button pressed
if (buttonforset == HIGH) {
activate =1;
lcd.clear(); }
while(activate== 1){
lcd.setCursor(0,0);
lcd.print("Set Alarm");
lcd.setCursor(0,1);
lcd.print("Hour= ");
lcd.setCursor(9,1);
lcd.print("Min= ");
buttonforhour = digitalRead(phour); // set hour for alarm
if (buttonforhour == HIGH){
h++;
lcd.setCursor(5,1);
lcd.print(h);
if (h>23){
h=0;
lcd.clear(); }
delay(100);
}
buttonformin = digitalRead(pmin); // set minutes for alarm
if (buttonformin == HIGH){
m++;
lcd.setCursor(13,1);
lcd.print(m);
if (m>59){
m=0;
lcd.clear();}
delay(100);
}
lcd.setCursor(5,1);
lcd.print(h);
lcd.setCursor(13,1);
lcd.print(m);
buttonforexit = digitalRead(pexit); // exit from set alarm mode
if (buttonforexit == HIGH){
activate = 0;
lcd.clear();
}
}
if (Hour== h && Min== m) {
int i=0;
do{
i++;
tone(6,450);
delay(70);
noTone(6);
delay(60);
}
while(i<4);
delay(700);
}
}
--------------------------------------------------------------------------------------------------------------------------
Follow steps:
>first connect RTC modual to the Arduino
|__follow this during upload code
> //rtc.setDOW(SATURDAY); // Set Day-of-Week
//rtc.setTime(10, 0, 0); // Set the time
//rtc.setDate(11, 11, 2017); // Set the date
In this three line first remove ' // ' and set time and upload code,
after upload code again make this three line as comments by add ' // '
before line.and upload code again \
why do this operation ?
>when you upload first time code Time is set in the RTC, but when you reset your arduino bord Time is again set at your first upload Time everytime .that's you have to upload code again with making that three line as comment.
>after doing above steps connect all components as per diagram, and test your system.
IF YOU HAVE ANY QUERY PLEASE ASK IN COMMENT.


buenas el programa que tiene puesto no funciona problemas con el sensor DS1.2.3 PODRIA PASARME EL QUE FUNCIONE MUCHAS GRACIAS
ReplyDelete